Controlling Data Entry Using Form Fields
Creating 'Encoded' Name & Value Pairs
Passing data from one form to another
Addressing Form Field Validation with Regular Expressions and JavaScript 1.2
You are here: irt.org | Articles | JavaScript | Form | Chapter 6: Beginning JavaScript [ previous next ]
Published on: Sunday 29th April 2001 By: Paul Wilton
Select elements have three event handlers, onblur, onfocus, and onchange. We've seen all these events before. We saw the onchange event with the text box element, where it fired when focus was moved away from the text box and the value in the text box had changed. Here it fires when the user changes which option in the list is selected.
Let's take a look at an example that uses the onchange event and makes good use of the select element in its drop-down list form. Its purpose is to calculate the difference, in days, between two dates as set by the user via drop-down list boxes.
<HTML>
<HEAD>
<SCRIPT LANGUAGE=JavaScript>

function writeOptions(startNumber, endNumber)
{
  var optionCounter;
  for (optionCounter = startNumber; optionCounter <= endNumber; optionCounter++)
  {
      document.write('<OPTION value=' + optionCounter + '>' + optionCounter);
  }
}

function writeMonthOptions()
{
   var theMonth;
   var monthCounter;
   var theDate = new Date();

   for (monthCounter = 0; monthCounter < 12; monthCounter++)
   {
      theDate.setMonth(monthCounter);
      theMonth = theDate.toString();
      theMonth = theMonth.substr(4,3);
      document.write('<OPTION value=' + theMonth + '>' + theMonth);
   }
}

function recalcDateDiff()
{
  var myForm = document.form1;

   var firstDay = myForm.firstDay.options[myForm.firstDay.selectedIndex].value;
   var secondDay =
      myForm.secondDay.options[myForm.secondDay.selectedIndex].value;

   var firstMonth =
      myForm.firstMonth.options[myForm.firstMonth.selectedIndex].value;
   var secondMonth =
      myForm.secondMonth.options[myForm.secondMonth.selectedIndex].value;

   var firstYear =
      myForm.firstYear.options[myForm.firstYear.selectedIndex].value;
   var secondYear =
      myForm.secondYear.options[myForm.secondYear.selectedIndex].value;

   var firstDate = new Date(firstDay + " " + firstMonth + " " + firstYear);
   var secondDate = new Date(secondDay + " " + secondMonth + " " + secondYear);

   var daysDiff = (secondDate.valueOf() - firstDate.valueOf());
   daysDiff = Math.floor(Math.abs((((daysDiff  / 1000) / 60) / 60) / 24));
   myForm.txtDays.value = daysDiff;

   return true;
}

function window_onload()
{
   var theForm = document.form1;
   var nowDate = new Date();

   theForm.firstDay.options[nowDate.getDate() - 1].selected = true;
   theForm.secondDay.options[nowDate.getDate() - 1].selected = true;

   theForm.firstMonth.options[nowDate.getMonth()].selected = true;
   theForm.secondMonth.options[nowDate.getMonth()].selected = true;

   theForm.firstYear.options[nowDate.getFullYear()- 1970].selected = true;
   theForm.secondYear.options[nowDate.getFullYear() - 1970].selected = true;
}

</SCRIPT>
</HEAD>
<BODY LANGUAGE=JavaScript onload="return window_onload()">
<FORM NAME=form1>
<P>
First Date<BR>

<SELECT NAME=firstDay SIZE=1 onchange="return recalcDateDiff()">
<SCRIPT LANGUAGE=JavaScript>
   writeOptions(1,31);
</SCRIPT>
</SELECT>

<SELECT NAME=firstMonth SIZE=1 onchange="return recalcDateDiff()">
<SCRIPT LANGUAGE=JavaScript>
   writeMonthOptions();
</SCRIPT>
</SELECT>

<SELECT NAME=firstYear SIZE=1 onchange="return recalcDateDiff()">
<SCRIPT LANGUAGE=JavaScript>
   writeOptions(1970,2010);
</SCRIPT>
</SELECT>
</P>

<P>
Second Date<BR>

<SELECT NAME=secondDay SIZE=1 onchange="return recalcDateDiff()">
<SCRIPT LANGUAGE=JavaScript>
   writeOptions(1,31);
</SCRIPT>
</SELECT>

<SELECT NAME=secondMonth SIZE=1 onchange="return recalcDateDiff()">
<SCRIPT LANGUAGE=JavaScript>
   writeMonthOptions();
</SCRIPT>
</SELECT>

<SELECT NAME=secondYear SIZE=1 onchange="return recalcDateDiff()">
<SCRIPT LANGUAGE=JavaScript>
   writeOptions(1970,2010);
</SCRIPT>
</SELECT>
</P>

Total difference in days
<INPUT TYPE="text" NAME=txtDays VALUE=0>
<BR>
</FORM>

</BODY>
</HTML>
Call the example ch6_examp9.htm and load it into your web browser. You should see the form below, but with both date boxes set to the current date.
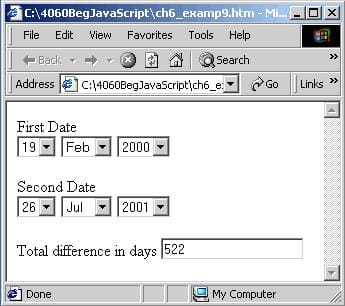
If you change any of the select boxes, then the difference between the days will be recalculated and shown in the text box.
In the body of the page, the form in the web page is built up using six drop-down list boxes, and one text box. Let's look at an example of one of these select elements; take the first <SELECT> tag, the one that allows the user to choose the day part of the first date.
<SELECT NAME=firstDay SIZE=1 onchange="return recalcDateDiff()">
<SCRIPT LANGUAGE=JavaScript>
   writeOptions(1,31);
</SCRIPT>
</SELECT>
The SIZE attribute has been set to 1 so that we have a drop-down list box rather than a list box. The onchange event handler has been connected to the recalcDateDiff() function that we'll be looking at shortly.
However, there are no <OPTION> tags defined within the <SELECT> element. With all the options that the drop-down list boxes need to be populated with, I'd have to be one cruel person to make you type it all in! Instead we populate the options using the functions, which make use of the document.write() method.
The date and year options are populated using the writeOptions() function declared in the head of the page. The function is passed two values, the start number and the end number of the options that we want the select element to be populated with. Let's look at the writeOptions() function.
function writeOptions(startNumber, endNumber)
{
  var optionCounter;
  for (optionCounter = startNumber; optionCounter <= endNumber; optionCounter++)
  {
      document.write('<OPTION value=' + optionCounter + '>' + optionCounter);
  }
}
The function is actually quite simple, consisting of a for loop that loops from the first number (startNumber) through to the last (endNumber) using the variable optionCounter, and writes out the HTML necessary for each <OPTION> tag. The text for the option and the VALUE attribute of the <OPTION> tag are specified to be the value of the variable optionCounter. It's certainly a lot quicker than typing out the 31 <OPTION> tags necessary for the dates in a month.
You might wonder why the document.write() method is being used at all; why not use the methods of adding new options we saw before?
Firstly this way works with both IE and NN, so there is no need to write two separate bits of code. Secondly, adding new options to <SELECT> elements when the page is being loaded sometimes proves difficult in NN as a page refresh may be required before the changes take effect.
For the year select box the same function can be re-used. We just pass 1970 and 2010 as parameters to the writeOptions() function to populate the year select box.
<SELECT NAME=firstYear SIZE=1 onchange="return recalcDateDiff()">
<SCRIPT LANGUAGE=JavaScript>
   writeOptions(1970,2010);
</SCRIPT>
</SELECT>
To populate the month select box with the names of each month, a different function will be needed. However, the principle behind populating the <SELECT> element remains the same, using document.write(). The function in this case is writeMonthOptions() as you can see from the month select element below.
<SELECT NAME=firstMonth SIZE=1 onchange="return recalcDateDiff()">
<SCRIPT LANGUAGE=JavaScript>
   writeMonthOptions();
</SCRIPT>
</SELECT>
The new function, writeMonthOptions(), is defined in the head of the page. Let's take a look at it now. We start the function by defining three variables, and initializing the variable, theDate, to today's date.
function writeMonthOptions()
{
   var theMonth;
   var monthCounter;
   var theDate = new Date();
We use the Date object we have stored to get the months as text (Jan, Feb,... ,Dec). We get these months by setting the month in the theDate variable from 0 up to 11 using the setMonth() method in a for loop. Although the Date object does not provide a method for returning the date as anything other than a number, it does have the toString() method, which returns the value, as a string, of the date stored in the variable. It returns it in the format day of week, month, day of the month, time and finally year, for example Sat Feb 19 19:04:34 2000. We just need the month part. As we always know where it will be in the string and that its length is always 3, we can easily use the String object's substr() method to extract the month.
   for (monthCounter = 0; monthCounter < 12; monthCounter++)
   {
      theDate.setMonth(monthCounter);
      theMonth = theDate.toString();
      theMonth = theMonth.substr(4,3);
      document.write('<OPTION value=' + theMonth + '>' + theMonth);
   }
}
Having got our month as a string of three characters, we can then create the <OPTION> tag and populate its text and value with the month.
For user convenience it would be nice on page load to set both of the dates in the select elements to today's date. This is what we do in the window_onload() function, which is connected to the window's onload event using the <BODY> tag:
<BODY LANGUAGE=JavaScript onload="return window_onload()">
The window_onload() function is defined in the head of the page. We start the function by setting the theForm variable to reference our Form object, as it shortens the reference needed in our code. Next we create a variable to hold a Date object to store today's date.
function window_onload()
{
   var theForm = document.form1;
   var nowDate = new Date();
Setting each of the <SELECT> box's initial values is easy; the value returned by the Date object nowDate can be modified to provide the required index of the options[] array. For the day, the correct index is simply the day of the month minus 1 - remember that arrays start at zero, so day 1 is actually at index 0. The selected property is set to true to make that day the currently selected option in the list.
   theForm.firstDay.options[nowDate.getDate() - 1].selected = true;
   theForm.secondDay.options[nowDate.getDate() - 1].selected = true;
The month is even easier as the getMonth() function returns a value from 0 to 11 for the month, which exactly matches the necessary index value for our options[] array.
   theForm.firstMonth.options[nowDate.getMonth()].selected = true;
   theForm.secondMonth.options[nowDate.getMonth()].selected = true;
For the year, because we are starting with 1970 as our first year, we need to take 1970 from the current year to get the correct index value.
   theForm.firstYear.options[nowDate.getFullYear() - 1970].selected = true;
   theForm.secondYear.options[nowDate.getFullYear() - 1970].selected = true;
}
The final part of our code that needs looking at is the function connected to the onchange event of each select element, namely the recalcDateDiff() function. Our first task in this function is to build up the two dates the user has selected using the drop down lists.
function recalcDateDiff()
{
  var myForm = document.form1;

   var firstDay = myForm.firstDay.options[myForm.firstDay.selectedIndex].value;
   var secondDay =
      myForm.secondDay.options[myForm.secondDay.selectedIndex].value;

   var firstMonth =
      myForm.firstMonth.options[myForm.firstMonth.selectedIndex].value;
   var secondMonth =
      myForm.secondMonth.options[myForm.secondMonth.selectedIndex].value;

   var firstYear =
      myForm.firstYear.options[myForm.firstYear.selectedIndex].value;
   var secondYear =
      myForm.secondYear.options[myForm.secondYear.selectedIndex].value;
We go through each select element and retrieve the value of the selected Option object. The selectedIndex property of the Select object provides the index we need to reference the selected Option object in the options[] array. For example in:
var firstDay = myForm.firstDay.options[myForm.firstDay.selectedIndex].value;
the index is provided by myForm.firstDay.selectedIndex. We then use that value inside the square brackets as the index value for the options[] array of the firstDay select element. This provides the reference to the selected Option object, whose value property we store in the variable firstDay.
We use this technique for all the remaining select elements.
We can then create new Date objects based on the values obtained from the select elements and store them in variables firstDate and secondDate.
   var firstDate = new Date(firstDay + " " + firstMonth + " " + firstYear);
   var secondDate = new Date(secondDay + " " + secondMonth + " " + secondYear);
Finally we need to calculate the difference in days between the two dates.
   var daysDiff = (secondDate.valueOf() - firstDate.valueOf());
   daysDiff = Math.floor(Math.abs((((daysDiff  / 1000) / 60) / 60) / 24));
The Date object has a method, valueOf(), which returns the number of milliseconds from 1st Jan 1970 to the date stored in the Date object. We subtract the value of the valueOf property of firstDate from the value of the valueOf property of secondDate and store this in the variable daysDiff. At this point, it holds the difference between the two dates in milliseconds, so we convert this to days in the following line. By dividing by 1000 we make the value seconds, dividing by 60 makes this minutes, by 60 again makes it hours, and finally we divide by 24 to convert to our final figure of days difference. The Math object's abs() method makes negative numbers positive. The user may have set the first date to a later date than the second and as we just want to find the number of days difference, not find out which is the earlier day, we make any negative results positive. The Math.floor() method removes the fractional part of any result and returns just the integer part rounded down to the nearest whole number.
Finally we write the number of days difference to the txtDays text box in the page.
   myForm.txtDays.value = daysDiff;

   return true;
}
That completes our look at the more useful form elements available in web pages. The next section returns to the trivia quiz, where we can put our new found knowledge to good use and actually create a working quiz page.
Controlling Data Entry Using Form Fields
Creating 'Encoded' Name & Value Pairs
Passing data from one form to another
Addressing Form Field Validation with Regular Expressions and JavaScript 1.2